US Passport Photo Size Requirements (2026 Guide)
US passport photo size is 2×2 inches (51×51mm) at 600×600px minimum on a plain white background — plus the head height and eye line that cause most rejections.
You printed the photo at the drugstore kiosk, mailed it in with your application, and three weeks later a letter comes back: photo doesn't meet requirements. No refund on the kiosk print, no explanation beyond a checkbox, and now you're mailing the whole application again.
The US passport photo size isn't vague, and it isn't a matter of taste. It's 2×2 inches (51×51mm), a minimum of 600×600 pixels if submitted digitally, on a plain white or off-white background, with your head measured to within a few millimeters of a fixed range. Miss any one of those numbers and the State Department's review — automated first, human second — kicks the application back. This guide walks through every number that trips people up, why each one exists, and how to hit all of them in one pass.
US Passport Photo Size at a Glance
| Spec | Requirement |
|---|---|
| Print size | 2×2 in (51×51 mm) |
| Digital resolution | 600×600 px minimum |
| Head height | 1–1⅜ in (25–35 mm), chin to crown |
| Eye height from bottom | 1⅛–1⅜ in (28–35 mm) |
| Background | Plain white or off-white |
| Format | JPEG |
| File size (online renewal) | Under 6 MB |
| Glasses | Not permitted, any style |
| Photo age | Taken within the last 6 months |
| Make one now | Make a US passport photo |
What Is the Exact Size of a US Passport Photo?
2×2 inches. Square, not the 35×45mm rectangle most other countries use — if you've ever applied for a UK or Schengen visa, that's exactly where the confusion starts. The US format stays square across every document type: passport, passport card, and DS-160 visa photo all use the identical 2×2 in frame.
In millimeters, that's 51×51mm. In pixels, the State Department's Online Passport Renewal upload requires 600×600 px minimum — no stated maximum, but going much past 1,200×1,200 px just adds upload time without improving the print. A photo that's 600×600 px at 300 DPI happens to print out at exactly 2×2 inches, which is not a coincidence; it's how the spec was built.
Key takeaway: if you're applying for a different country's visa in the same sitting, don't reuse the crop. Use imresizer's 2×2 inch tool for the US spec specifically — a 35×45mm crop will fail the square-aspect check outright, and no amount of stretching fixes that without distorting your face.
Why Do Head Height and Eye Line Cause Most Rejections?
This is the number most people get wrong, because it isn't printed anywhere on the application form — it's buried in the State Department's photo guidance PDF, not the form itself. Your head, measured from the chin to the top of the hair, needs to fall between 1 and 1⅜ inches (25–35mm). That's roughly 50–69% of the full 2-inch frame height.
Too small, and your face reads as a speck in a sea of white background — an automatic reject during the facial-recognition check. Too large, and the crown of your head gets cropped off, which fails just as fast, just from the opposite direction. There's no cropping tool that eyeballs this correctly; it has to be measured against the frame edges, not guessed by how "centered" the face looks.
Here's what most guides skip: eye position matters almost as much as head size, and it's a completely separate measurement. Your eyes need to sit 1⅛ to 1⅜ inches (28–35mm) up from the bottom edge of the photo. Get the head height exactly right but shoot from a slightly high or low angle, and the eye line still drifts outside spec — because a tilted camera changes where the eyes fall in the frame even when the chin-to-crown distance stays correct.
Between these two measurements, they account for the largest share of rejections that aren't background-related. A four-millimeter miss on either one is enough to fail. That's not a lot of room, and it's why "just crop it so it looks about right" doesn't work here.
Key takeaway: head height and eye line are two separate checks, not one — a photo can pass one and fail the other, so measure both against the frame, not against how the photo looks to your eye.
Why Are Glasses Banned in US Passport Photos?
Since November 2016, the State Department has banned glasses in passport photos entirely — no exceptions for prescription lenses, no exceptions for photochromic or tinted lenses. Before that date, glasses were allowed as long as there was no glare; that carve-out is gone.
The reason is facial recognition, not style. Frames obscure part of the eye region and cast reflections that the matching algorithm reads as noise, and even clear glass distorts the eye shape enough to reduce match confidence against future scans — at airports, at renewal, at any point the photo gets compared against your face again. Removing glasses removes the variable entirely.
If you wear glasses daily and worry about looking unrecognizable without them, that's a valid concern — but it's not one the State Department accommodates. Take the photo without them. If dilated pupils or a recent eye exam make that impractical for a day or two, most people just wait and retake the photo when their eyes settle, rather than submit one with glasses and risk the rejection cycle.
Key takeaway: glasses are a hard fail, not a soft one — there's no lens type, tint, or frame style that passes, so remove them before you shoot, not after you've already been rejected once.
Why Do Mail-In and Online Passport Renewal Need Different Files?
Not everyone renews the same way, and the two paths want physically different things from the same photo. Mail-in applications — first-time passports, most renewals, and anyone under 16 — require an actual printed photo attached to the paper form. Online Passport Renewal, available to a subset of eligible adult renewals, wants a digital file uploaded directly through the portal.
The print path cares about physical dimensions and paper quality: 2×2 inches at 300 DPI, on actual photo paper, not a home inkjet print on copier stock. The digital path cares about pixel dimensions and file weight: 600×600 px minimum, JPEG format, under 6 MB. A file built correctly for one doesn't automatically work for the other — a 300 DPI print scaled down to save upload time can drop below 600×600 px, and a digital file exported without DPI metadata can print at the wrong physical size even though the pixel count looks fine.
Here's the part that surprises people: the 6 MB cap for online renewal is generous almost to the point of being irrelevant. A correctly sized 600×600 px JPEG typically lands between 40–150 KB — nowhere near 6 MB. Meanwhile, print labs enforce their own quieter standard: files under 300 DPI get flagged as "low resolution" even when the pixel count is technically compliant, because DPI is a print-time calculation, not a stored file property, and a lab's software checks it against the intended print size. Downscaling a file to speed up an upload can quietly drop it under that DPI threshold for printing, even though it still clears 600×600 px on paper.
Key takeaway: know which path you're using before you export — mail-in wants a 300 DPI physical print, online renewal wants a compact digital file, and building one from the other without checking both numbers is how a technically-sized photo still gets kicked back.
Digital File or Print Sheet — Which One Do You Need?
imresizer gives you two different outputs from the same uploaded photo, because "a passport photo" means two different files depending on what you're doing with it next. Uploading to Online Passport Renewal and handing a print to a mail-in application need different things, and using the wrong one is a quiet way to get rejected.

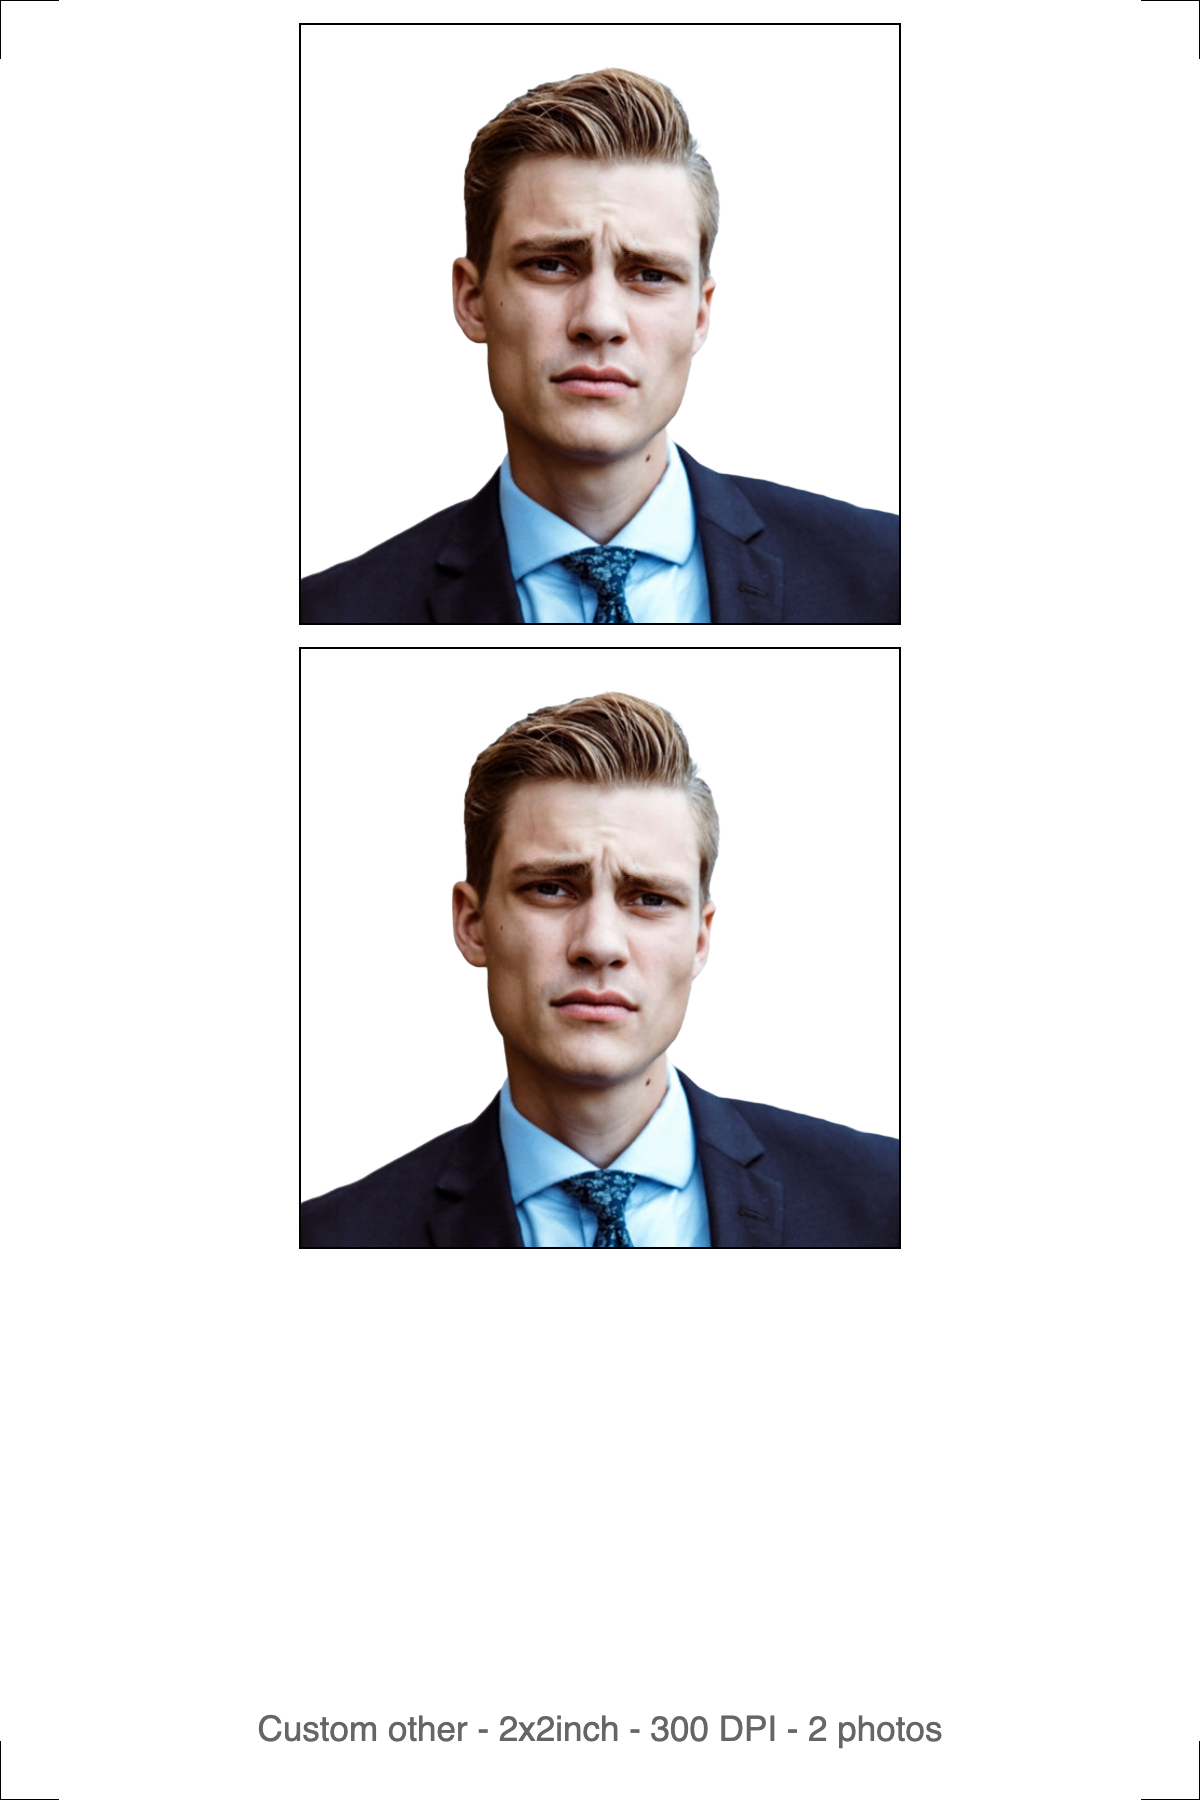
Left: the digital file for Online Passport Renewal. Right: the 4R print sheet for a mail-in application.
The digital file — for Online Passport Renewal
One photo, cropped to the exact 2×2 in ratio, background replaced with plain white, compressed to a size well under the 6 MB cap. This is the exact file you upload through the renewal portal — nothing more.
No borders, no margins, no cut marks. The portal measures your head height and eye line against the photo's own edges, so an extra white border around the image shifts every measurement even when the crop underneath is correct — and fails the automated check for a reason that has nothing to do with your face.
The print sheet — for a mail-in application
The same photo, tiled onto a standard 4R (6×4 in) photo paper sheet at 300 DPI, with cut guides marking exactly where to trim. This is what you hand to a photo lab or send to a home printer for a mail-in application. A few things matter here:
Key takeaway: upload the digital file, print the sheet — never crop the print sheet down to make a digital upload, and never mail the single digital photo file expecting it to be a physical print.
Should You Use Automatic or Manual Mode?
Automatic mode is the default, and it's what most people should use. It detects your face, applies the 2×2 in crop with correct head height and eye position, removes the background, and replaces it with plain white — all in one pass, no manual selection required.
Manual mode hands you the controls instead. You crop the region yourself first, then the background gets removed, then you download — three separate steps instead of one. Switch to it when automatic detection gets the framing wrong, which happens most often with partial face occlusion, an unusual camera angle, or a baby who won't hold still and look at the lens.
The toggle sits above the upload area, and it needs to be set before you upload — it decides which processing screen you land on next, not something you switch mid-edit.
Key takeaway: start with automatic mode every time; only drop to manual once you've seen it get the crop wrong, rather than pre-emptively assuming it will.
Is a DS-160 Visa Photo the Same as a US Passport Photo?
Dimensionally, yes — completely. The DS-160 nonimmigrant visa application uses the identical 2×2 inch, 600×600 px, plain-white-background spec as the US passport photo. Same head height range, same eye line range, same 6-month age limit.
The difference is entirely in where the file goes, not what it looks like. DS-160 photos upload directly into the online visa application form as part of the application itself. Passport photos either travel as a physical print with a mail-in application or upload through the separate Online Passport Renewal portal. Different forms, different upload widgets, same underlying image.
If you're renewing a passport and applying for a visa in the same stretch of time — a common overlap for anyone traveling soon after a renewal — one correctly built photo covers both. There's no need to reshoot or recrop for the second form. Use imresizer's DS-160 visa photo tool if you want the file run through checks specific to that form's upload widget, but the underlying spec doesn't change between the two.
Key takeaway: build one photo to the 2×2 in / 600×600 px / white-background spec and it satisfies both a passport application and a DS-160 visa form — you're not solving two problems, just uploading the same solution twice.
How to Make a US Passport Photo Using imresizer
- Go to imresizer.com/united-states-passport-photo
- Upload your photo — click the button or drag and drop. Supports JPG, PNG, and WebP.
- Pick your mode before processing — automatic or manual, covered above.
- The tool auto-detects your face and applies the 2×2 in / 600×600 px crop with correct head height and eye position. The background converts to plain white automatically.
- Download — you get both a digital file sized for Online Passport Renewal or DS-160 upload, and a 4R print sheet for a mail-in application.
Everything runs in your browser — no signup, no watermark, and your photo never leaves your device.
Key Takeaways
Free Passport & Visa Tools
Frequently Asked Questions
What is the exact size of a US passport photo?
2×2 inches (51×51mm), with a minimum digital resolution of 600×600 pixels. It's a square format used for US passports, passport cards, and DS-160 visa photos alike. Head height should measure 1–1⅜ inches from chin to crown, with eyes positioned 1⅛–1⅜ inches up from the bottom edge.
Can I wear glasses in a US passport photo?
No. The State Department banned glasses of any kind — prescription, tinted, or photochromic — starting in November 2016. Frames and lenses interfere with the facial-recognition check the photo is measured against. If you normally wear glasses, take the photo without them; there's no exception that applies.
What's the difference between a mail-in and Online Passport Renewal photo?
Mail-in applications need a physical 2×2 inch print at 300 DPI on photo paper, attached to the paper form. Online Passport Renewal, available to some eligible adult renewals, needs a digital JPEG file under 6 MB uploaded directly through the portal. The pixel spec is the same either way — the output format differs.
Is a DS-160 visa photo the same size as a US passport photo?
Yes. Both use the 2×2 inch (600×600 px minimum) format with a plain white background and the identical head height and eye line ranges. Only the submission point differs — DS-160 photos upload directly into the visa application form, while passport photos go through a mail-in print or the renewal portal.
Why did my US passport photo get rejected?
The most common reasons are a background that isn't flat white, a head height or eye line outside the required millimeter range, glasses in the shot, or a photo older than six months. Fix the crop and background numerically with a dedicated tool rather than adjusting by eye, then resubmit at exactly 600×600 px.
More Passport & Visa Guides
This guide is part of our Passport & Visa hub — tools and guides for creating compliant passport, visa, and ID photos from home.